So last summer my office outlet just died. A completely dead outlet, no warning, no smell, nothing dramatic. My laptop charger stopped charging in the middle of a Zoom call. I figured the charger was bad. Tried a different one. Still nothing. Then I grabbed the lamp from across the room and plugged it in. The lamp stayed dark. I had a fully dead outlet on my hands.
I almost called an electrician right then. I had already pulled up Google and typed “electrician near me.” The going rate where I live is about $85 to $110 an hour, and most local guys charge a two-hour minimum just to come out. So I was about to drop $200 before anybody even looked at anything.
Then my wife walked by, glanced into the bathroom across the hall, and said, “did you check the GFCI in there?”
I had not. I did not even know the bathroom outlet was wired to the office outlet. One button push later, the laptop was charging again. Five seconds of work. Zero dollars spent. I sat there feeling pretty stupid.
This guide is for the panicked version of me from that afternoon. Before you spend $200, $300, or even $500 on an emergency electrician, walk through these dead outlet checks first. Most dead outlets in a normal house come down to one of four things, and you can figure out which one in about ten minutes with no tools, or with a six dollar tester if you want to be safe. We will cover the basic dead outlet fix, the GFCI outlet reset, the tripped breaker reset, and the loose wire problem. At the end I will tell you when you really do need a pro, and roughly what it should cost you when you get one. For more background on home electrical safety, the Electrical Safety Foundation International has a free homeowner guide worth reading after this article.
High-CPC Keywords: electrician cost per hour, electrical panel replacement cost, dead outlet not working, GFCI outlet reset, home electrical repair near me.
Part 1: First Things First (Is the Dead Outlet Really Dead?)
Before you start opening anything up or staring at your breaker panel, take 90 seconds to confirm the problem is actually the outlet and not the thing you plugged into it. I have seen people pay a service call just to find out their phone charger was the broken part. That is a real bill someone paid in my neighborhood last year.
The Dead Outlet 30-Second Cross Check
Grab a lamp you know works. Plug it into the suspect dead outlet. If the lamp lights up, your problem is the device you were using, not the outlet. Lamps are great test tools because there is nothing to boot, no app to open, no battery to recharge. Just a switch and a bulb.
Now plug that same lamp into a nearby outlet that you know works. This step is the one most people skip, and it is the one that catches the dumb mistakes. It confirms the lamp itself is fine. I once spent twenty minutes troubleshooting a “dead” outlet that turned out to be a bad bulb in my test lamp. Do not be me.
Test Both Sockets
Most outlets in the United States are duplexes, which is a fancy word for two sockets in one face plate. Test both. Sometimes only the top socket is dead. Sometimes only the bottom is dead. That is actually useful information. A half-dead outlet usually means a switched outlet, where one socket is controlled by a wall switch, or a half-hot outlet, which builders sometimes use for table lamps in living rooms.
If only one socket is dead and the other works, look around for a wall switch you may not have flipped. About half of all switched outlets are wired so the top is switched, and most homeowners forget which one is which. Try every switch in the room. You will look silly, but in maybe one in three cases the problem is solved right there.
If both sockets are dead and the lamp works fine in a different outlet, you actually have an outlet problem. Move on to Part 2. This is where the real fix usually happens.
Part 2: The GFCI Reset (The 90% Dead Outlet Fix Most People Miss)
This is the trick that would have saved me $200 last summer. If you only remember one thing from this whole article, remember this one. The GFCI reset will fix more dead outlets than every other method combined.
What Is a GFCI and Why Should You Care?
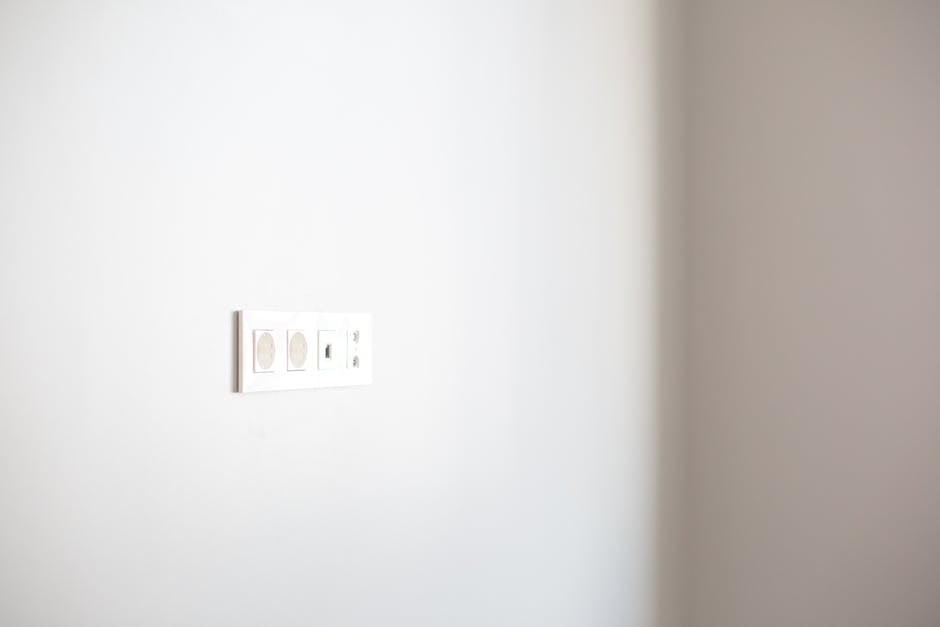
GFCI stands for Ground Fault Circuit Interrupter. It is an outlet with two little buttons in the middle, one usually labeled “TEST” and one labeled “RESET.” You will find them in kitchens, bathrooms, garages, basements, and outdoor outlets. They are required by code in any room where water might splash, because their job is to cut power instantly the moment they sense electricity trying to take a shortcut to ground, like through your body.
Here is the part people miss. A single GFCI outlet often protects a whole chain of regular outlets downstream from it. So when the GFCI in your bathroom trips, every downstream outlet in your office, your hallway, or your living room can become a dead outlet, even though those outlets have no buttons on them and look completely normal. There is no warning. There is no flashing light in most cases. The downstream outlets just stop working.
How to Find the Right GFCI
Walk through your house and look for outlets with two buttons in the middle. Check every bathroom, every kitchen counter outlet, the garage, the basement, the laundry room, and any outdoor outlet. Sometimes builders install one in the most random place you can imagine, like a closet or behind a piece of furniture. If you have a finished basement, check there too.
When you find one, look at the buttons. On most modern GFCIs, if the unit has tripped, the RESET button will be sticking out a bit further than the TEST button. On older units it can be hard to tell. Just push RESET firmly. You should feel a small click. If it clicks, you tripped it back into the on position. Go check your dead outlet right away. This single reset has solved more dead outlet calls in my neighborhood than every other fix combined.
Why One Bathroom GFCI Kills the Office Outlet
This caught me off guard, and it catches almost every new homeowner off guard. When a builder wires up a home, they often run one circuit through multiple rooms to save copper. They put the GFCI in the wettest room on the circuit, because that is what the code requires, and then they daisy-chain the dry rooms downstream. So your office, your hallway, and your living room outlet might all be downstream from the GFCI in the bathroom you barely use.
If the RESET button does not stay in after you press it, and the button pops back out, you have a real ground fault somewhere on that circuit. That means something plugged into one of the outlets on that chain is leaking current. Unplug everything on the circuit. Then push RESET again. If it holds now, plug things back in one at a time until it trips again. The last thing you plugged in is the culprit.
Part 3: Check Your Breaker Panel (The Tripped Breaker Fix)
If no GFCI is the answer to your dead outlet, your next stop is the breaker panel. Most homes have one main panel, usually in the garage, the basement, a utility closet, or sometimes outside on a wall. Apartments often have a smaller panel inside a hallway closet. You are looking for a gray metal box with a door, and when you open it you will see two rows of black switches.
How to Spot a Tripped Breaker
A normal breaker is in the ON position, pointing toward the center of the panel. A tripped breaker is usually in a middle position, pointing neither all the way on nor all the way off. This is the part that trips people up. People look at the panel, see no breakers in the off position, and conclude nothing is wrong. But a tripped breaker is not quite off. It is in a halfway state, and you have to look carefully to spot it.
Run your finger across each breaker. The tripped one will feel slightly different, slightly mushy, slightly out of line with its neighbors. If you have a flashlight on your phone, shine it sideways across the breakers. The tripped one casts a shadow at a different angle. Once you spot it, you have your culprit.
The Right Way to Reset a Breaker
This part matters. You cannot just push a tripped breaker back to ON. The breaker will not actually reset that way, even though it feels like it has. You have to push it all the way to OFF first, then push it back to ON. Off, then on. That is the only way the internal mechanism actually resets.
After you do this, walk back to the dead outlet and test it again. If it works, you are done. If the breaker trips again immediately, you have a short somewhere on that circuit and you should not keep resetting it. Repeatedly resetting a breaker that keeps tripping is the fastest way to start a fire. Unplug everything on the circuit, reset the breaker one more time, and then plug things back in one at a time until it trips. That last thing is your problem.
If the Panel Itself Looks Bad
Open the panel door and just look for a minute. If you see any of these, stop and call an electrician. Rust on the breakers. Brown burn marks around any breaker. A breaker that feels hot to the touch. A faint burning smell when you open the door. A buzzing or sizzling sound. Any of those signs and you are looking at a panel issue, not a circuit issue. Electrical panel replacement cost runs about $1,500 to $4,000 depending on the panel and your area, but a small panel repair might be $200 to $500. Get a quote before you agree to anything.
Part 4: The Loose Wire Problem (Slightly Advanced, Still Easy)
This one takes a little nerve and a $6 voltage tester, but if Parts 1 through 3 did not solve the problem, this is where the dead outlet issue usually lives. Loose wires inside an outlet are the third most common cause of a dead outlet I see, after GFCI trips and tripped breakers. The fix takes about ten minutes.
Safety First, No Exceptions
Before you touch anything inside an outlet, turn off the breaker that feeds it. Walk to your panel, flip the breaker for that circuit to OFF. Then walk back and plug your test lamp into the outlet and try a nearby outlet. If both are dead now, the right breaker is off. If only one is dead, you flipped the wrong breaker. Try again.
Once you are sure the power is off, buy a non-contact voltage tester. They cost about $6 to $15 at any hardware store. Brands like Klein, Fluke, and Sperry all make decent ones for under twenty bucks. Hold the tip near the wires you are about to touch. If it beeps or lights up, the power is still on and you flipped the wrong breaker. Walk away and try again. Never trust the breaker label alone. People mislabel them all the time.
Backstabs Are the Enemy
Open the outlet by unscrewing the face plate, then unscrewing the two screws holding the outlet to the wall box. Gently pull the outlet out of the box. You will see two ways the wires can be connected. The good way is wires looped under screws on the side of the outlet. The bad way is wires shoved into little holes on the back of the outlet. Those back holes are called backstabs, and they are the most common source of loose-wire failures in American homes.
Backstabs rely on a tiny spring inside the outlet to grip the wire. Over fifteen or twenty years, that spring weakens and the connection gets loose. Loose connections heat up, and heat makes the spring weaker still. Eventually the connection fails and the outlet goes dead.
The fix is to pull the wires out of the backstab holes (there is a small release slot you push with a flat screwdriver) and re-attach them under the side screws. Bend the bare end of each wire into a small hook, wrap the hook clockwise around the screw, and tighten the screw down hard. Black wire on the brass screw, white wire on the silver screw, bare copper or green on the green screw. Screw the outlet back into the box, put the cover plate on, and turn the breaker back on.
When to Just Replace the Outlet
If the wires look corroded, burned, or melted, do not reuse the outlet. New outlets cost $2 to $4 each at any hardware store. Spec-grade outlets are about $5 to $8 and they last much longer. While you are in there, just swap it out. Spend the extra five bucks. You are already doing the work.
Part 5: When You Actually Need an Electrician (and What It Should Cost)
Okay, real talk. There are situations where you should put the screwdriver down and call a licensed electrician. I am big on doing things yourself, but I am bigger on not burning your house down or getting yourself killed.
Warning Signs You Cannot DIY
If you see or smell any of these, stop and call a pro the same day. A burning smell coming from any outlet, switch, or your breaker panel. Brown or black scorch marks on an outlet face. An outlet that is warm or hot to the touch when nothing is plugged in. Sparks when you plug something in, beyond the tiny harmless spark you sometimes get with vacuums. A constant buzzing or sizzling sound from a wall or a panel. Flickering lights across multiple rooms. Breakers that trip the moment you reset them. Tingling when you touch an appliance.
Any of those are signs of a serious problem, possibly an arc fault or a hot neutral, and they can cause a fire while you sleep. They are also illegal for an unlicensed person to repair in most states.
What an Electrician Should Cost You
Hourly rates for a licensed residential electrician usually run $75 to $130 an hour in most of the country, with bigger cities closer to $150 or higher. Most have a service-call minimum of one to two hours. So a basic visit costs $150 to $300 before any parts.
Common job ranges I have paid or seen friends pay:
- Replace a single outlet or switch: $80 to $200
- Diagnose and fix a dead circuit: $150 to $400
- Install a new dedicated circuit (running new wire): $300 to $800
- Replace a breaker panel: $1,500 to $4,000
- Whole-home rewire: $8,000 to $20,000 or more
Get at least two quotes for anything over $300. Reputable electricians give free written estimates. If someone refuses to put a price on paper, find someone else. Ask for their license number and look it up on your state’s contractor licensing board. It takes two minutes online and it will save you from being scammed.
The kicker is that for the dead outlet that started this whole article, the most you should ever need to spend is the cost of a new outlet (around $4) and a voltage tester (around $10). Total: $14. Compared to a $200 service call, you have just saved yourself a tank of gas and a fancy dinner. That is the entire point of this site.
If you found this walkthrough helpful, our companion guide on what to do when a pipe bursts at midnight is right here: Burst Pipe or Major Water Leak? Here Is Exactly What to Do in the First 10 Minutes. And for kitchen DIY savings, see our guide to fixing the three most expensive kitchen problems for under $20.
I told you at the start that most dead outlet problems are not real emergencies. They feel like emergencies because the lights are off and the laptop is dead and you have a Zoom call in twelve minutes. But the actual fix is almost always one of four things, and three of those four cost nothing. Walk through Parts 1 through 4 calmly, in order, and you will solve about nine out of ten dead outlet problems in your home for the price of a sandwich. Save the electrician for the day you actually need one, and your wallet will thank you for years. For long-term safety, the U.S. Consumer Product Safety Commission home electrical safety guide is a useful follow-up read.
Elena Park covers home electrical and HVAC topics for coverhub.fun. Her background in residential electrical service work — outlets, breakers, GFCIs, central air conditioning, and the steady stream of small failures that send most homeowners straight to a service tech — shapes the way her guides are written: figure out what’s actually wrong first, then decide whether you’re looking at a $0 reset or a real repair.
Elena focuses on the service calls that most often turn out to be DIY-safe: a single dead outlet that’s really a tripped GFCI two rooms over, a thermostat that’s reading wrong, a clogged AC condensate line, or a frozen evaporator coil masquerading as a dying compressor. She’s just as clear-eyed about the work that does not belong in a homeowner’s hands — anything inside the main electrical panel, any sustained burning smell, any breaker that won’t stay reset.
Each piece on her byline gets a final safety pass before publishing. Suggestions, corrections, and reader questions are welcome at editorial@coverhub.fun.