Is your washer not draining at the end of the cycle — leaving the drum half-full of cloudy gray water and a soggy heap of clothes sitting in it? Before you book a $200 to $300 appliance repair visit, give yourself 15 minutes. A washing machine that fills, agitates, and spins but refuses to pump the water out is one of the most predictable failures in the laundry room, and the cause is almost always a clogged drain pump filter, a kinked drain hose, a sock stuck in the pump, a tripped lid switch, or a wrong cycle selection — all of which a homeowner can diagnose with a flashlight, a towel, and a flat screwdriver.

Why a washer not draining is rarely a dead pump
Appliance techs see this call all week long, and they’ll tell you the breakdown looks like this: roughly 35% are clogged drain pump filters trapping coins, lint, and small fabric items, 20% are kinked or trapped drain hoses behind the machine, 15% are objects (socks, bra wires) lodged in the pump impeller, 15% are bad lid or door switches that fail to authorize the spin/drain phase, 10% are wrong cycle settings or paused cycles, and only the final 5% are genuine pump-motor or control-board failures that need a pro. Walk the six steps below in order and you’ll almost always finish in the cheap, fast DIY zone — usually well under 20 minutes from soaked clothes to spinning drum.
Tools you actually need
- A flashlight or phone torch
- A shallow bucket or pan and two old towels (the filter step will spill water)
- Needle-nose pliers
- A flat-head and a Phillips screwdriver
- A wet/dry shop vac — optional but speeds the drain-hose check
Step 1: Confirm it’s a drain problem, not a paused cycle
This sounds obvious until you’ve watched a tech bill someone $130 to press one button. Most modern washers pause the cycle if you opened the lid mid-spin, if the load is unbalanced, or if the user accidentally selected a no-spin / soak option. Close the lid firmly, press START / PAUSE once, and wait two minutes. If the pump kicks on and water leaves the tub, you’re done. If you bought into the washer not draining panic for nothing, you’ve still gained the muscle memory for the next time.
Step 2: Clean the drain pump filter — the single biggest fix
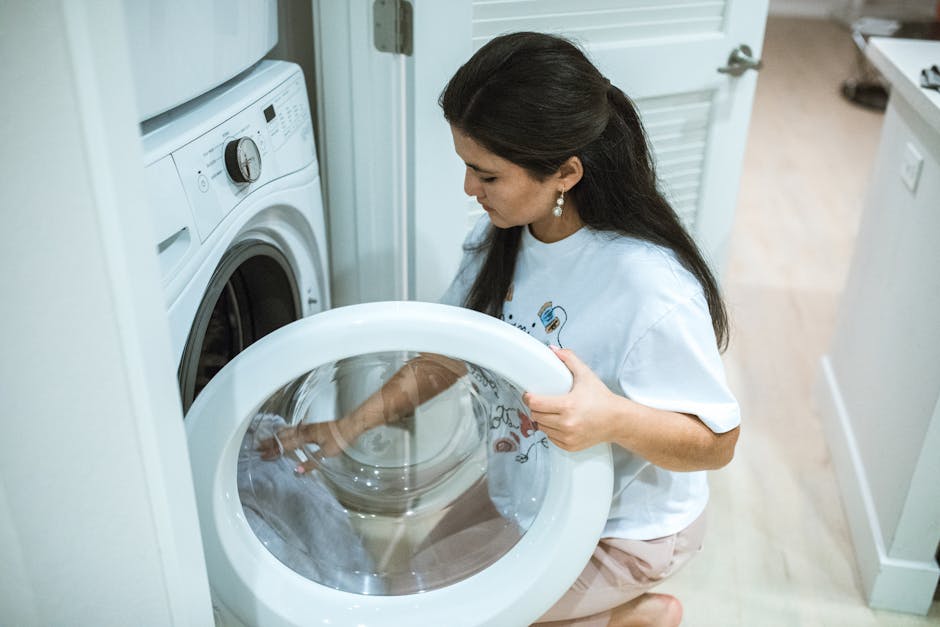
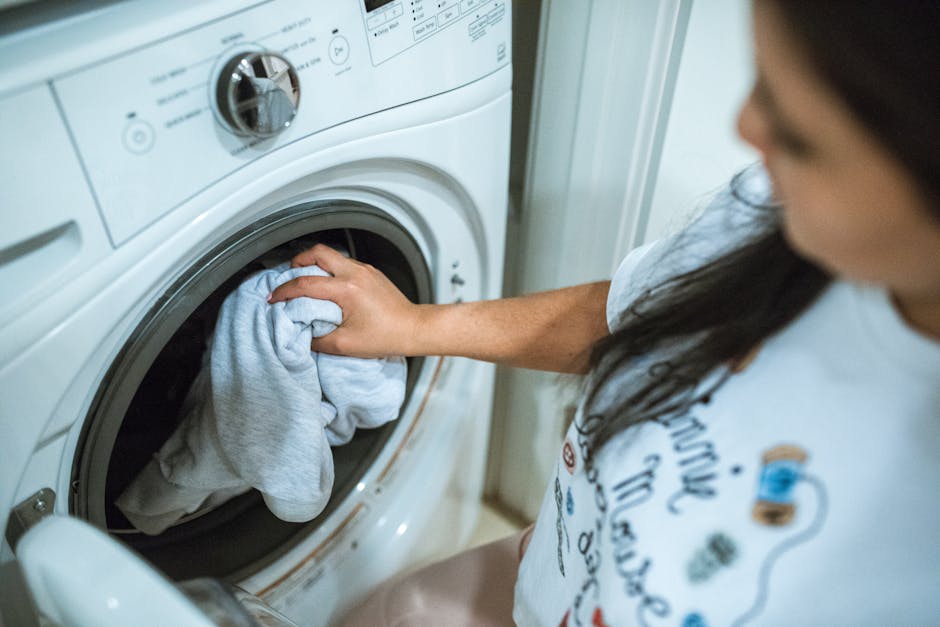
This one step solves a third of all washer not draining calls outright. On front-load machines, the filter (sometimes labeled “drain pump access” or just a small round hatch) lives behind a small kick-panel at the bottom front of the unit. On many top-loaders, the filter is inside the agitator or near the drain pump under the back panel — check the manual or look up your model on the manufacturer support site. Lay towels down, put a shallow pan under the filter, unscrew the cap slowly to let trapped water out, and pull the filter. You’ll typically find coins, hair, lint felt, a screw or two, and a tiny sock you forgot about in 2023. Rinse the filter in the sink, screw it back in firmly, and run a drain-only cycle to test.
Step 3: Inspect the drain hose for kinks and clogs
Pull the washer a few inches from the wall and look at the corrugated black or gray drain hose. A surprising number of washer not draining service calls turn out to be the hose pinched flat behind the machine after someone moved it for cleaning, or twisted into a tight loop when delivery installers shoved the unit into place. The hose must rise into a standpipe or laundry sink at a height between 24 and 96 inches off the floor — too low and the tub siphons (it never quite finishes draining); too high and the pump can’t push water up to it. Disconnect the hose end at the standpipe, hold it over a bucket, and start a drain cycle. Water gushing means the hose was the blockage. No water means the pump or filter is still the suspect.
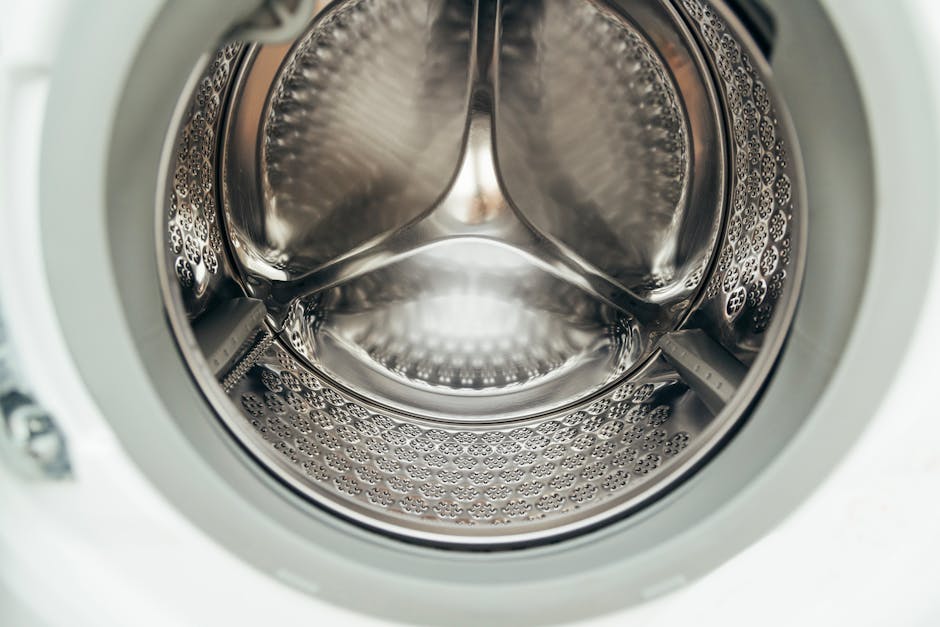
Step 4: Check the pump impeller for foreign objects
If the filter was clear and the hose runs freely, the pump impeller itself may have a sock, an underwire, or a coin jammed against the vanes. With the filter cap off (and the machine unplugged), shine a flashlight into the pump opening and use needle-nose pliers to fish out anything in the impeller area. Spin the impeller with a fingertip — it should turn freely with a slight resistance. A washer not draining problem from a jammed impeller is the most satisfying fix in the laundry room: 30 seconds of tweezers work, and you’ve saved a $250 service call. Manufacturer support pages like Whirlpool’s appliance support center have model-specific photos of every pump layout.
Step 5: Test the lid (or door) switch
Top-loading washers refuse to spin or drain if the lid switch doesn’t register a closed lid — a safety feature so no one reaches into a spinning drum. Front-loaders use a door-lock assembly that does the same job. Push down firmly on the lid (or pull the door snug) and listen for a click. If the machine still won’t drain, the switch may be bent, broken, or simply needs cleaning. A new lid switch costs $15 to $30 and installs with two screws. If you’ve never tested a switch with a multimeter, the Consumer Reports washing machine buying guide includes basic appliance diagnostic explanations worth reading.
Step 6: Redistribute the load and reset the unit
An unbalanced load — a single heavy bath mat, a king-size comforter on one side — tells the washer to abort the spin phase, which also halts the final pump-out. Open the lid, spread the load evenly, and close again. Then unplug the unit for two minutes to reset the control board (works exactly like rebooting a router), plug back in, and run a drain-only or rinse-and-spin cycle. If your washer not draining issue clears after a reset and a redistribution, that’s your answer for next time too.
When to actually call an appliance repair tech
Bring in a pro if: you hear a loud grinding or burning-electrical smell from the pump area at any point, the control board displays an error code that won’t reset, the drum tilts visibly when full of water (a worn suspension), or the washer not draining issue survives all six steps above. Those are the rare cases — for everything else, you’ve just saved a service visit and a load of soaked laundry.
How to prevent the next washer not draining call
- Empty pockets every time — coins and screws are the #1 pump killer.
- Clean the drain pump filter every 3 months on front-loaders.
- Use mesh laundry bags for bras, baby socks, and anything else small enough to slip past the drum holes.
- Don’t overload the drum — clothes should fill no more than two-thirds of the empty space.
- Check the drain hose every time you pull the machine out for any other reason — pinches develop slowly.
Related quick-fix guides
If your laundry room is having a bad week, our companion guides on dryer not heating and dishwasher not draining follow the exact same diagnostic playbook. And while you’ve got the pliers out, bookmark our guide on what to do when a refrigerator stops cooling or a garbage disposal jams up — same toolkit, different appliance.
Final word
Nine times out of ten, a washer not draining problem is a $0 filter cleanout, a five-minute hose straightening, or a single sock fished out of the pump — not a $250 service call. Walk these six steps in order, empty those pockets, and the next sad puddle of gray water at the bottom of your drum will be a 15-minute fix, not a half-day disaster.
Aiden Brooks writes coverhub.fun’s home-appliance coverage, with a focus on the everyday breakdowns that prompt a $200–$300 service call when a no-cost fix would have worked just as well. His background in residential appliance service shows up in the structure of his guides: open with the failure pattern, walk through the cheapest checks first, and only get to parts replacement after every easy win has been ruled out.
Aiden focuses on dishwashers, garbage disposals, washing machines, dryers, and refrigerators — the workhorses that quietly drain household budgets when they go sideways. His recurring theme is that most ‘broken appliance’ verdicts are really a clogged filter, a kinked drain hose, a tripped thermal switch, or a piece of glass jammed in an impeller that sixty seconds with a flashlight can find. When a unit really is at end of life, he’ll tell you that too — and what to look for in a replacement.
Aiden also runs the appliance-safety editorial pass at coverhub.fun: every guide on his byline is reviewed against manufacturer safety guidance before going live. Reach him at editorial@coverhub.fun.