A dishwasher not cleaning — you unload it and find dried-on food on the plates, white film on the glasses, grit in the cup bottoms, or oily smears that weren’t there when you loaded the rack — is one of the most common and most overdiagnosed appliance complaints in the kitchen. People assume the dishwasher is “old” or “dying”; in reality it’s almost always doing exactly what it’s been told to do with the parts and water it’s been given. Before you book a $130 appliance service call, give yourself 30 minutes. A dishwasher not cleaning is almost always one of five things: a clogged filter at the bottom of the tub, blocked spray-arm holes you’ve never thought to inspect, water that isn’t hot enough at the inlet, an empty rinse-aid reservoir on a unit that depends on it, or a load packed so densely that water can’t reach half the surfaces. Walk through the six checks below before spending a dollar.

Why a dishwasher not cleaning is rarely a “replace the appliance” problem
Appliance techs see this complaint constantly, and the failure breakdown is remarkably consistent. Roughly 35% of every “dishwasher not cleaning” service call is a filter at the bottom of the tub clogged with food debris that has nowhere to go — modern dishwashers have removable cylindrical filters that almost no one cleans because no owner’s manual ever mentioned them. Another 25% is one or both spray arms with several holes blocked by mineral scale, glass shards, or food bits, so half the rack gets no water at all. About 15% is incoming water below 120°F at the dishwasher inlet — the detergent enzymes are designed to activate above that temperature and at 105°F they simply don’t work. About 10% is an empty or off rinse-aid dispenser combined with hard water, leaving white film that looks like “not clean.” About 10% is overloading and incorrect rack arrangement that blocks spray patterns. And only the final 5% is a failing wash pump or motor. The math is friendly: 95% of these calls are something a careful homeowner can resolve themselves.
Tools you actually need
- An old toothbrush and a toothpick
- A bottle of white vinegar (a full quart)
- A digital instant-read thermometer ($10)
- A microwave-safe measuring cup
- A flashlight
- A fresh bottle of liquid rinse aid (any brand)
Before you start: Run a normal wash cycle empty so you can hear the dishwasher’s full sound profile and confirm the wash pump is running. If you hear a healthy churning sound throughout the cycle, you know the motor is fine and the problem is mechanical or chemical — the focus stays on the parts inside the tub. If you hear no churning at all, the diagnostic moves toward the dishwasher not draining walk-through, which covers the pump-and-motor side of the same machine.
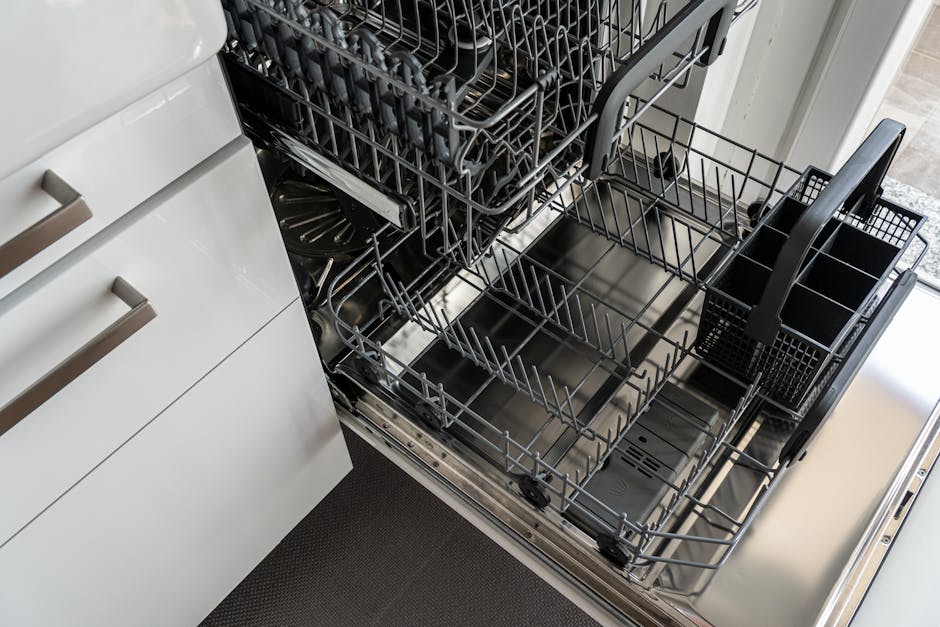
Step 1: Pull and clean the bottom filter
This is the single highest-payoff move for a dishwasher not cleaning diagnosis and the most-skipped maintenance task in any kitchen. Pull the bottom rack out, look at the floor of the tub, and find the filter assembly — usually a cylindrical mesh that twists out (quarter turn counterclockwise) and a flat mesh plate beneath it. Lift both out and look at what’s down there: a healthy filter is empty; an ignored filter holds a paste of food debris and grease that has been recirculating onto your dishes for months. Rinse both pieces under hot tap water with the toothbrush, scrub gently, reseat and lock. About 40% of homeowners with this complaint are done at this step alone. From now on, clean the filter every 4 weeks — it takes 90 seconds.
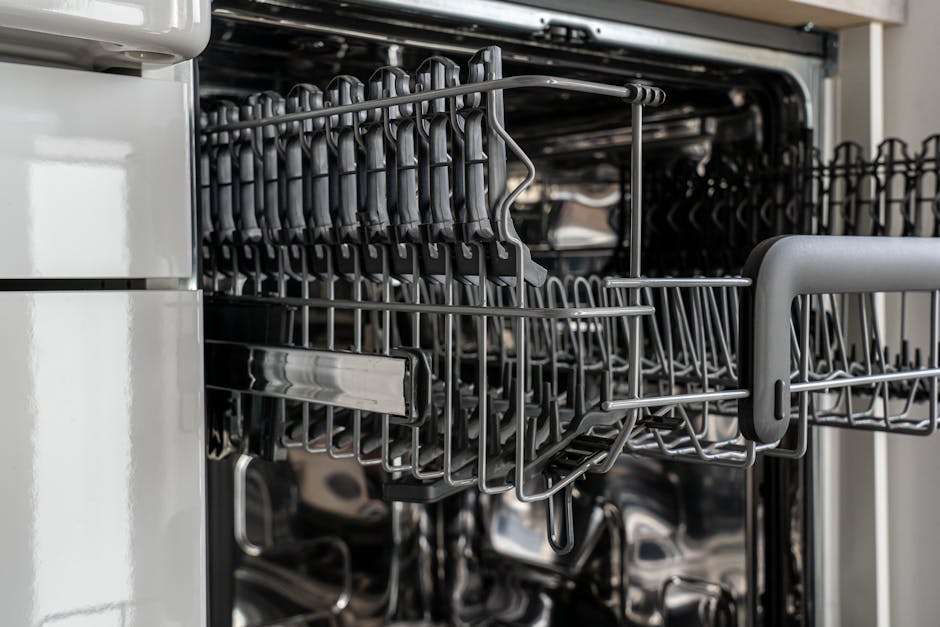
Step 2: Clear the spray-arm holes
Unsnap the lower spray arm (most pull straight up off a spindle, some unscrew with a center nut) and lift the upper spray arm out as well. Hold each up to the light and look at every hole — you’ll see small dark dots where mineral scale, glass shards, or food bits have plugged the jet. Use a toothpick to probe each blocked hole from both sides, then run hot water through the arm to flush. Spin the arm on your finger after reinstalling to confirm it rotates freely. A dishwasher not cleaning the top rack while the bottom is fine almost always traces to a blocked upper arm; a unit not cleaning the bottom rack while the top is fine almost always traces to the lower arm. The diagnostic is that clean.
Step 3: Check the inlet water temperature
Modern dishwasher detergents are enzyme-based and their cleaning activity drops off a cliff below 120°F. Open the kitchen sink, run the hot tap for 3 minutes (the dishwasher tees into this line and the cold standing water in the line has to clear first), then catch a stream in the measuring cup and stick the thermometer in. If you read 120°F or higher, you’re good. If you read 105 to 115, your water heater is set too low or the line run is too long — bump the heater thermostat up to 120°F (most U.S. water heaters ship at 110 or 115). The same hot-water-side diagnostic chain we walk through in our water heater walk-through applies in identical fashion here. Always pre-run the hot tap at the sink before starting a dishwasher cycle — this one trick fixes 1 in 6 complaints by itself.
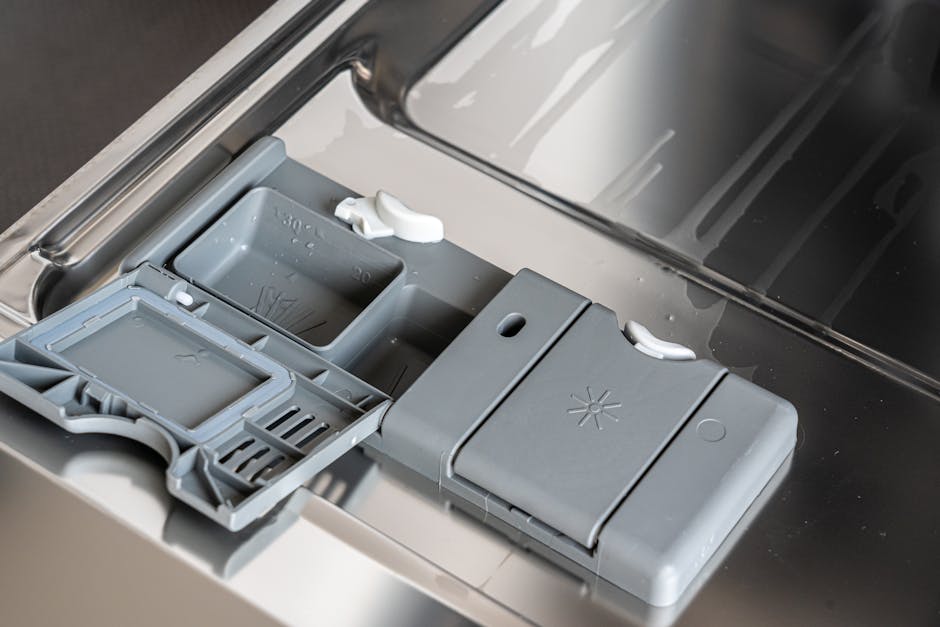
Step 4: Fill the rinse aid and run a vinegar cycle
If the filter is clean, spray arms are clear, and water is hot, but the glasses still come out with white film or chalky residue, you have a mineral problem — hard water leaving spots and softened detergent unable to keep dissolved solids in suspension. Two fixes layered: first, fill the rinse-aid reservoir to the line (it’s the small dispenser next to the detergent cup) — rinse aid is not optional in hard-water regions, and an empty reservoir is the #1 cause of “looks not clean” complaints. Second, run an empty hot cycle with a microwave-safe cup of plain white vinegar placed upright on the top rack — the vinegar dissolves scale on the heating element, tub walls, and spray-arm interiors. Do this monthly in any home with hard water.
Step 5: Evaluate loading and rack arrangement
A dishwasher not cleaning when the parts are healthy and the chemistry is right is usually being asked to clean an impossible load. Walk through the rules that most homeowners break: bowls face down and inward toward the spray arm at center, plates angle slightly inward so water hits the dirty side, big platters never block the upper spray-arm slot from below, tall items stay on the upper rack so they don’t block water rising to the upper arm, plastics go on the upper rack only (the heating element on the lower can warp them), and silverware mixes (forks and spoons facing alternating directions so they don’t nest). Never pre-rinse plates — modern detergents need food residue to grab onto chemically. And never overload — if any two items touch, water can’t reach the gap. Energy Star’s dishwasher guidance goes deeper on the load-pattern math and the no-pre-rinse rule.
Step 6: When to actually call a tech
Call a pro only if: filter, spray arms, water temp, rinse aid, and load pattern are all correct and a dishwasher not cleaning persists — that combination means the wash pump is weak (couldn’t push enough pressure through clean arms), the detergent dispenser door isn’t opening at the right point in the cycle (a $25 part but a deeper repair), or the heating element has failed and the cycle never reaches the second-rinse temperature where rinse aid activates. Also call if you see oily residue around the door gasket (water is leaking out instead of recirculating) or if the unit is more than 12 years old and the heating element is suspect — sometimes a $300 replacement makes more sense than a $200 repair on a tired appliance. The same low-pressure-pump diagnostic chain from our low water pressure walk-through partially overlaps with the dishwasher inlet side.
One last habit: clean the filter every 4 weeks, run an empty vinegar cycle monthly in hard-water regions, and never start a cycle without first running the kitchen-sink hot tap for 2 minutes. Those three rules will keep nearly any dishwasher cleaning every load in one cycle for the next decade and keep “dishwasher not cleaning” from becoming your problem in the first place. The cheapest repair is the one you prevent.
Aiden Brooks writes coverhub.fun’s home-appliance coverage, with a focus on the everyday breakdowns that prompt a $200–$300 service call when a no-cost fix would have worked just as well. His background in residential appliance service shows up in the structure of his guides: open with the failure pattern, walk through the cheapest checks first, and only get to parts replacement after every easy win has been ruled out.
Aiden focuses on dishwashers, garbage disposals, washing machines, dryers, and refrigerators — the workhorses that quietly drain household budgets when they go sideways. His recurring theme is that most ‘broken appliance’ verdicts are really a clogged filter, a kinked drain hose, a tripped thermal switch, or a piece of glass jammed in an impeller that sixty seconds with a flashlight can find. When a unit really is at end of life, he’ll tell you that too — and what to look for in a replacement.
Aiden also runs the appliance-safety editorial pass at coverhub.fun: every guide on his byline is reviewed against manufacturer safety guidance before going live. Reach him at editorial@coverhub.fun.